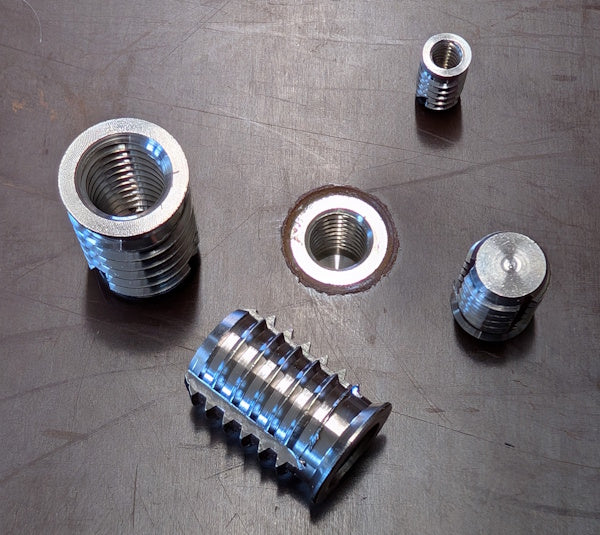
316 Stainless Steel Self-Tapping Inserts
These blind (closed end) self-tapping inserts are great for situations where you want to bolt or screw into softer materials like fibreglass, wood or plastic, especially if you have limited access for a thru nut and bolt. The inserts self-tap into the material, and we recommend to epoxy them into place for a secure and water-proof result.
IMPORTANT - PRACTICE INSTALLATION FIRST ON A SPARE PIECE OF MATERIAL
Sizes Of Self-Tapping Inserts
Our self-tapping inserts are available in metric sizes, ranging from M4 to M10. Also for some of the sizes we have both a standard version and a heavy-duty version, which has a thicker body and larger external diameter.

What Size Drill To Use For The Insert Installation Hole
A key decision point is what size hole to drill for the insert. With a pair of digital calipers we measure the outside diameter across the self-tapping threads of the insert. In the example case below (the M8 standard insert) the outside thread diameter is 12mm.

We also need to measure the core diameter of the insert (the outside body not including the threads) ....

So the insert has an outside thread diameter of 12mm and a core diameter of 10.15mm Our chosen drill needs to be between these sizes. In our experience for slightly harder materials such as good quality fibreglass it is better for the drill to be on the larger side, whereas for softer materials such as wood the drill size can be more close to the core diameter of the insert.
In the example we are looking at here the material that we are drilling into is Tufnol (a composite material a bit similar in mechanical characteristics to fibreglass). We choose an 11mm drill bit.
Pilot Hole
Before drilling the hole for the self-tapping insert, it is best to drill a small pilot hole. The reason for this is to get a better accuracy for the position of the insert (larger drills are more prone to moving as you get them started). Here we drill a partial depth 4mm pilot hole.

Caution: A small pilot hole is useful. Beware though of going up in small increments of drill bit, building up to the final size. With many materials (fibreglass, wood and Tufnol included) there can be a tendency for the drill to snag and drag itslef into the material in an uncontrollable way if the drill bit is only slightly larger than the last hole drilled.
Drilling The Main Hole For The Self-Tapping Insert
Drilling the hole for the insert and 90-degrees to the material is important for best results. To help with this, we have created a drill guide. The bottom of the drill guide is held flat against the work-piece to keep the drill bit at the right angle.

Position the tip of the drill bit into the pilot hole, then carefully bring down the drill guide into position. We will come back to the drill guide later when we wind the insert into the panel.
Countersinking The Hole
We also recommend to apply a small countersink to the top edge of the hole, this is for two reasons. The first is that the stainless steel insert itself, has a small countersink at the top and will sit better against the work-piece. The second reason is that when we wind the insert into the material and the threads bite their way into the work-piece they will cause a level of damage to the material, as well as cutting their threads. Applying the countersink helps to limit or prevent any visible damage to the upper surface of the work-piece.

How Do We Wind The Self-Tapping Insert Into The Material?
The threaded insert itself does not have any obvious feature to grab hold of for winding it (theading it) into the work-piece. Instead we use a 'spare' bolt and locking nut, but also it is helpful to use our drill guide, but this time with an inner sleeve fitted to match the diameter of the bolt.

Assembly Before Threading The Self-Tapping Insert
We put the bolt through the sleeve and through the drill guide. Then we wind a locking nut (just a spare nut) onto the end of the bolt. We wind the insert onto the end of the bolt, going all the way to the bottom and then backing off a couple of turns. With the aid of a good set of grips or a vice, we tighten the locking nut against the insert.

Cutting The Thread Into The Work-Piece With The Insert
Here we use the guide, bolt and a spanner to carefully wind the insert into the work-piece. A few things here are key to success:
- Downward pressure on the top of the bolt while you get the thread started
- Keeping the guide flat onto the work-piece
- Trying not to 'rock' the top of the bolt over while winding it it
- Keeping an eye on things, occasionally lifting up the guide
- If you sense any 'rocking' of the bolt (ie not going in square) in the first thread or two, persuading it back to the 90-degree position
Applying Epoxy For Final Installation Of The Self-Tapping Insert
This should be done, only when you are completely happy that the insert is going in properly. You should be confident by this point that the insert will go all the way in, and that you are not having to exert ever more force to turn the bolt (if you are having to exert more an more force, to an uncomforable level, you may need a slightly larger hole - of course if you are discovering this, you will have been working on a practice piece, so you can drill a new hole in the practice piece and start the process again).

First remove the bolt / insert assembly from the drill guide and re-tighten as before without the drill / bolt guide pieces. Next apply a generous coating of epoxy onto the threads of the insert (you can also put some into the hole of the work-piece). Then wind to insert into the work-piece, you will probably be able to start this by hand, then using a spanner when necessary.

Tighten the insert all of the way into the hole. Then with the use of a second spanner or socket, undo the lock nut without exerting any turning force on the insert itself. You can now remove the bolt and nut ready for clean-up.

Final Cleanup Of The Epoxy
Wipe away the excess epoxy being careful not to push any of it into the threads. A solvent such as Isopropyl Alcohol is useful to remove any final sticky residue of the epoxy from the surface of the work-piece.

Other Resources & Quick Links:
- Our 316-Grade Stainless Steel Self-Tapping Blind Inserts
- Our Drill & Installation Guide Jig
- Hex-head bolts
- Socket cap-head bolts
- Metric nuts